My Homelab Adventures
- tags
- #Homelab #Networking
- categories
- Homelab Networking
- published
- reading time
- 9 minutes
For quite a while, I have considered purchasing a server. Like most persons looking into acquiring greatly depreciated enterprise hardware, I’ve conceived many a justification for such a purchase, though ultimately have had to concede that it’s purely for the purpose of tinkering.
But what to buy?
Originally, I considered purchasing one of the many available Chinese X99 Xeon processor and motherboard packages that are available on sites such as Aliexpress. They present excellent value propositions, coming in at the sub 100 euros for a decent CPU, a motherboard, and 8 to 16GB ECC RAM. This is thanks to V3/4 E5 Xeons being plentiful, supporting both DDR3 and DDR4 memory, as well coming in all manner of configurations from fast 4 core models to slow(er) 22 core models (with V3 Xeons even being overclockable). However, they are not without issues. Genuine motherboards are difficult to come by, and expensive, so thus most of those packages come with Chinese motherboards typically built using components from scrapped enterprise motherboards (in either single or dual CPU configurations). Whilst this, in and of itself, is not an issue, such motherboards often also have weak and/or undercooled VRMs, questionable reliability, and (worst of all) flaky BIOSes. Namely, BIOSes are typically modified versions of existing firmware made for different hardware, leading to strange configuration options as well as me having a distrust for their security (e.g. in terms of kernel-level backdoors). Whilst these issues can be addressed in large part, for example by adding additional VRM cooling, and reflashing BIOSes to open-source community made ones, X99 systems are also very inefficient and power-hungry, which would make daily operation rather pricey.
Due to all of these issues, I turned to considering an AMD EPYC system. Whilst it may be hard to believe, the first generation was released over 7 years ago, so prices have fallen drastically. Such packages (available on for example Ebay and Aliexpress) have far fewer issues, as most motherboards are genuine Asus, Supermicro, etc ones. However, certain issues still exist, as those motherboards are more complex, and for example far more ‘peculiar’ in terms of CPU, GPU, and memory support (as well as still being rather power-hungry). Furthermore, whilst prices have fallen drastically from when these parts were new, a motherboard, processor, and 16-32GB memory set to get started will still set one back anywhere between 500-1000 euros. Whilst not expensive, I am sadly cheap, so this presented a little too tough of a pill to swallow. (Edit: I recently found out that there are very cheap embedded AMD EPYC 3151 motherboard/CPUs on eBay for around 60-80 euros, coming with 4 cores, and a low 25 TDP at idle, which seem rather appealing).
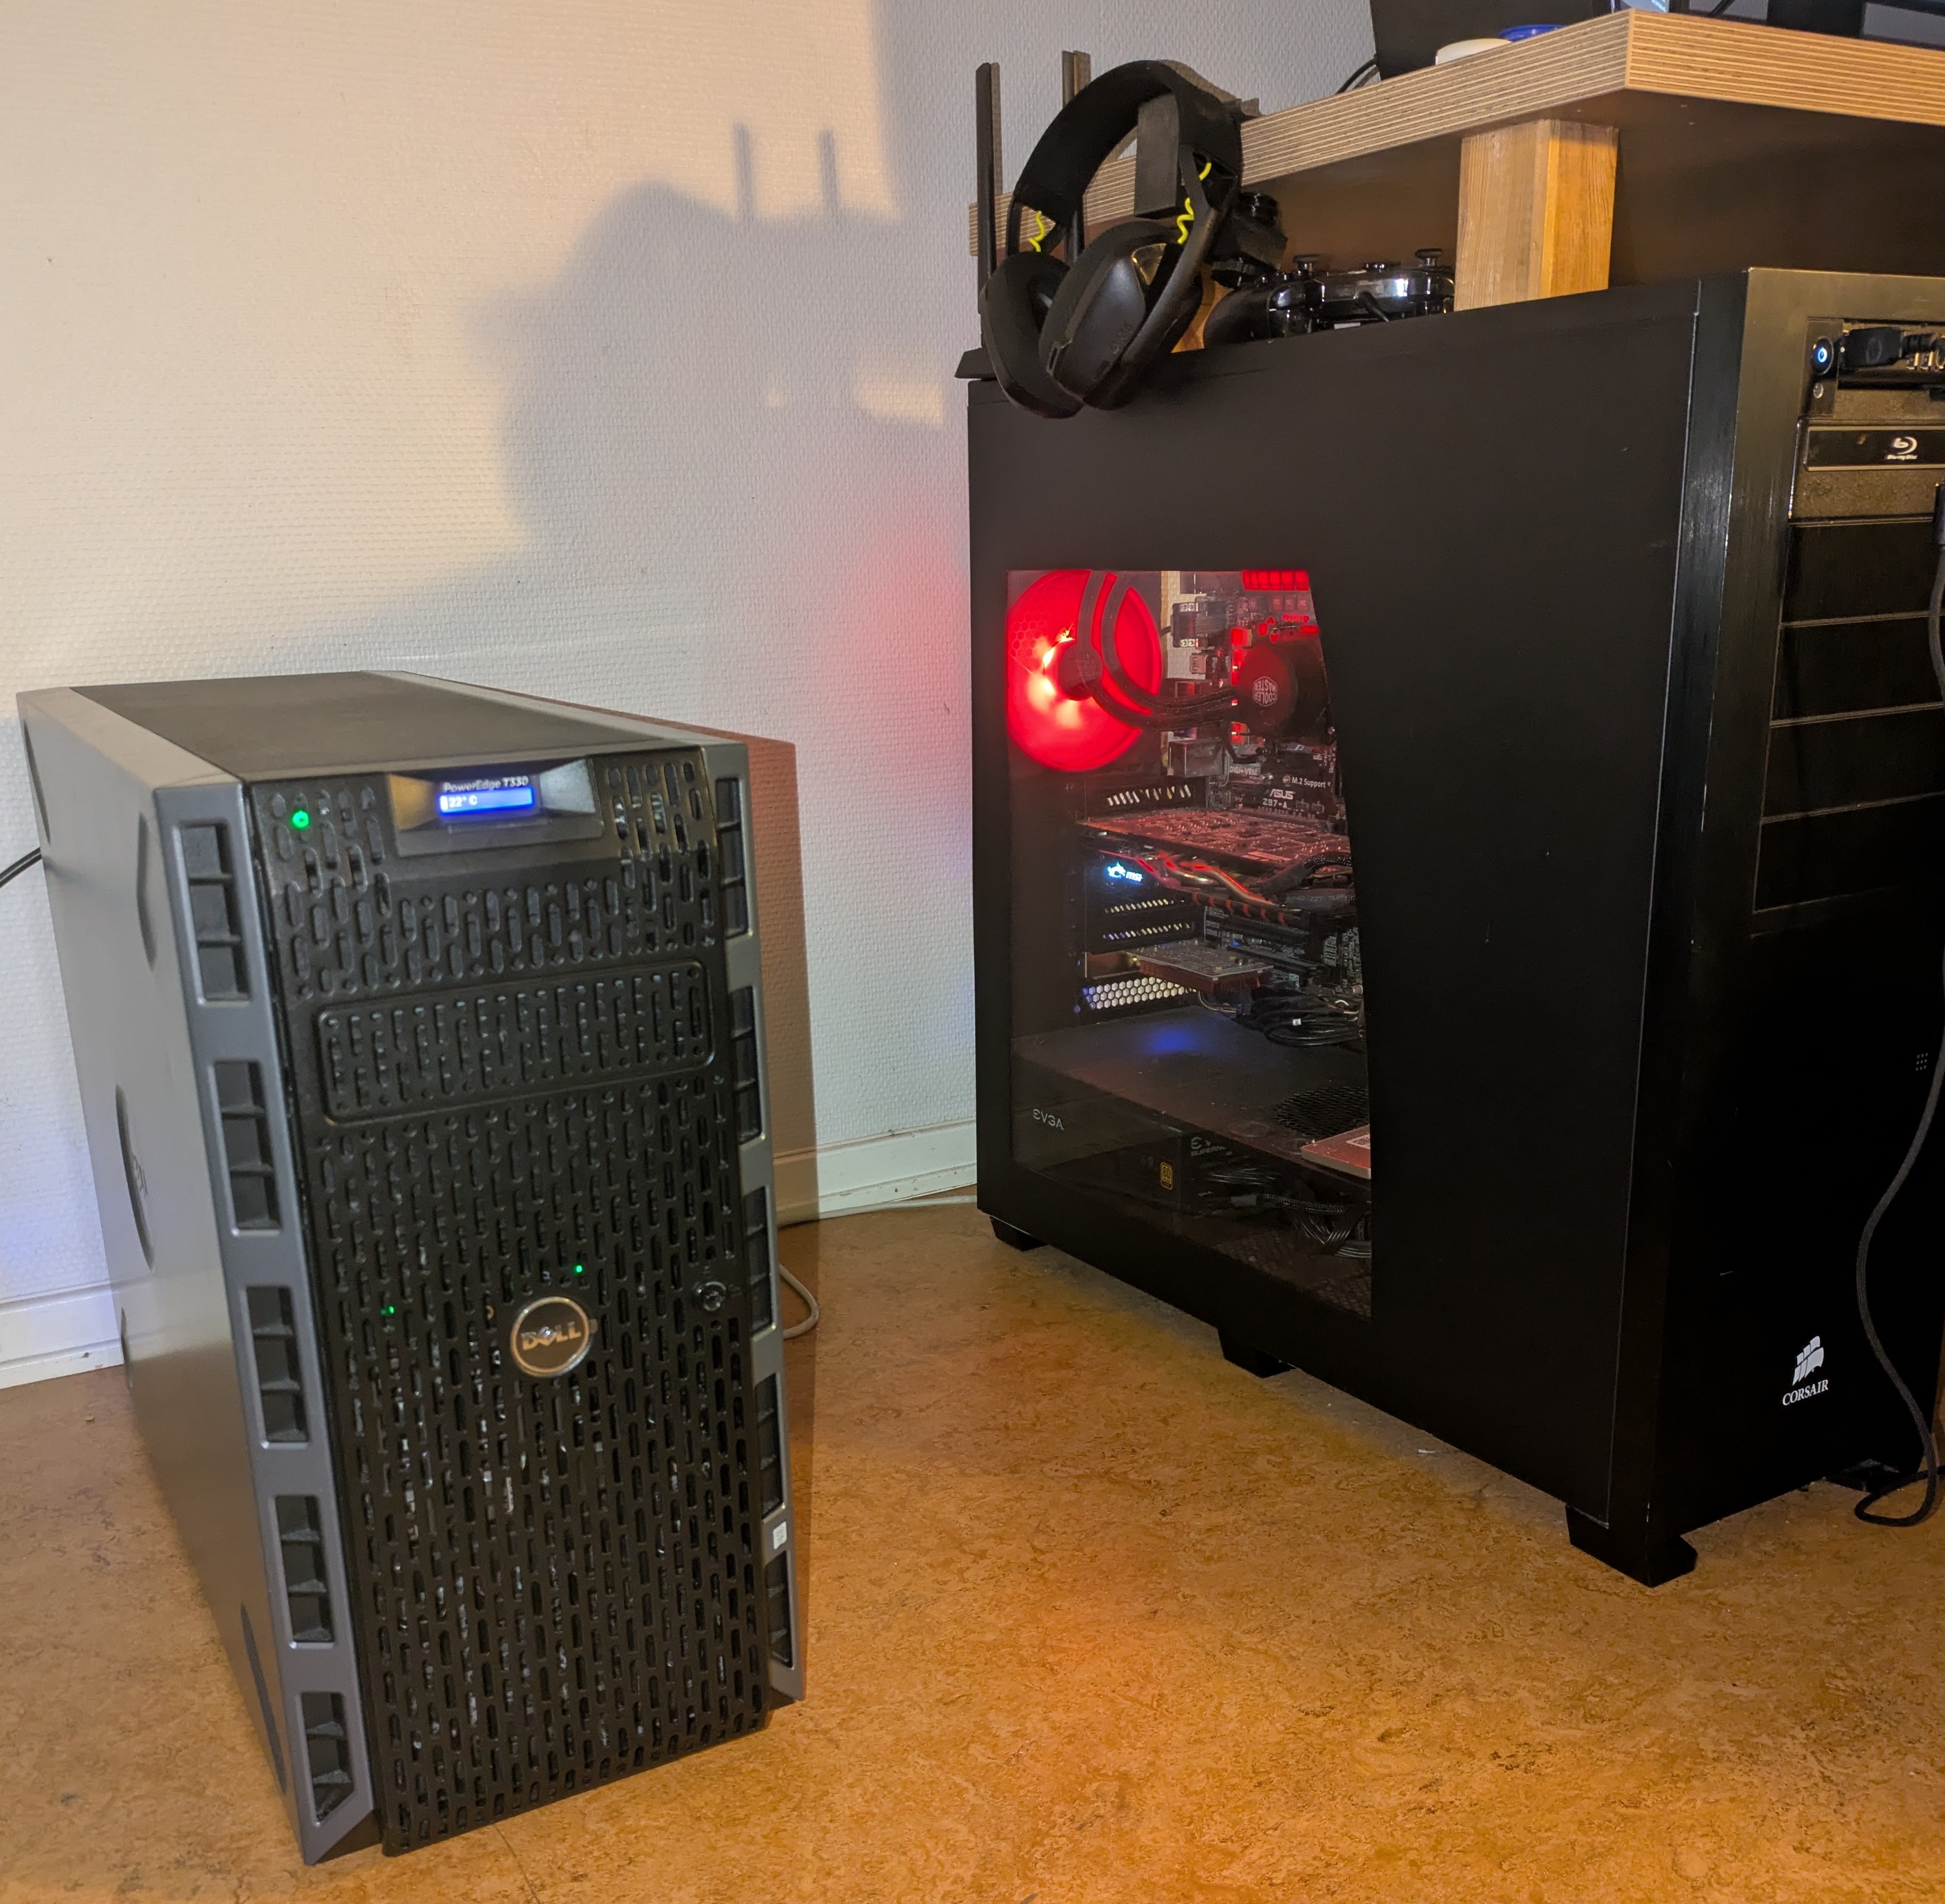
So what did I get, then? Well, as luck would have it, during my daily ritual consisting of perusing the Sweclockers classifieds, a server popped up for auction which I thought might go for cheap. It was, namely, a DELL Poweredge T330, with a 4-core E3-1220 V6, 8GB of 2400Mhz ECC RAM, and 2 Dell Enterprise 1TB harddrives. Feeling somewhat cheeky, I put in a bid of 400 crowns, and to my surprise the seller agreed! Even more luckily, it was just a 5 minute walk away from my apartment, so after lugging home a server that was far heavier than I expected, I was now the proud owner of one tower server!
First Impressions
Due to my long-standing interest in tinkering with computers, I didn’t expect much about the server itself to surprise me. After all, I’ve previously bought/sold/owned a fair share of business-line desktops from Dell, HP, etc, so how different could a server be to a typical workstation?
Well, as a matter of fact, quite different! This server, namely, has quite a few fantastic features I haven’t seen in consumer/enterprise computers. For one, it comes with a built-in LCD display, which shows (and even allows you to modify) a range of settings and information, from the current power draw and temperature of the server, to the iDRAC IP (we’ll come back to iDRAC in a short bit). On the inside, it has a very well thought-out air duct to push air through the system, over the fanless CPU cooler, and even a hardware RAID card. The power supply, capable of delivering ~570 watts, is platinum rated and hot swappable and, unlike most servers, the motherboard has a plethora of connectors including plenty of USB ports, and dual 10-gig ethernet ports. Additionally, it has 8 hot-swappable drive bays, and a spare PCI express slot - useful if in the future I want to add a GPU card for e.g. running a local AI model. This fantastic forum post has a lot more information on the system and some of its pitfalls.
After a good look at the hardware, the next step naturally was to power it up and get to doing “server stuff”! Oh how wrong I was…
Start-up
The first problem I ran into was that I somehow didn’t have a single VGA cable at home. Neither did I have any spare GPUs which only require a single 6-pin power connector, or which can run on just the 75W a PCIE slot provides. No worries, I thought, I’ll just use the inbuilt iDRAC-8 system.
iDRAC, standing for “Integrated Dell Remote Access Controller” is a hardware module built into the server which (as the name suggests) allows for remote access via a network. It automatically configures itself when a network cable is plugged in, and settings such as the local IP address can be changed via the aforementioned integrated LCD panel. Whilst this could have solved my issues, allowing me to remote in via my desktop on my local network, the iDRAC system sadly didn’t have the default password, and the previous owner didn’t know the current one either. What’s more, after a few hours of googling and reading manuals, it turned out that there is no way to reset the controller without logging into it. Thus, left with only one other option, I conceded and went out and bought a VGA cable.
So now it’s just a matter of booting it up, accessing the BIOS, and resetting the iDRAC controller, right?
Not quite… With the system turned on, connected to a monitor, and with a spare keyboard plugged in, I couldn’t get any keyboard input to detect (thus being unable to stop the boot process and enter the iDRAC setup page). I tried a few different USB ports, considering that maybe only some were active prior to booting into an OS, but that didn’t work either. Finally, I tried a different keyboard, and I was in!
iDRAC Configuration
With iDRAC finally reset, I managed to log-on to the administration console. Before doing anything else, I thought it wise to update to the newest firmware, as I’d found a few CVEs related to iDRAC-8 which the system runs. With the latest updates downloaded, I tried to install them. But this, too, proved to be far more of a challenge then I first thought.
Namely, thanks to the wonderful developers over at Dell and my 7 year old iDRAC and BIOS firmware versions, it wasn’t possible to update to the newest version directly - it would simply fail each time. After some more googling, I found that one must instead step update, skipping only a few versions at a time. After installing what was at least 5 different versions, I finally had the system updated! So now, surely, it’s just a matter of setting up whatever virtualisation platform I want, right?
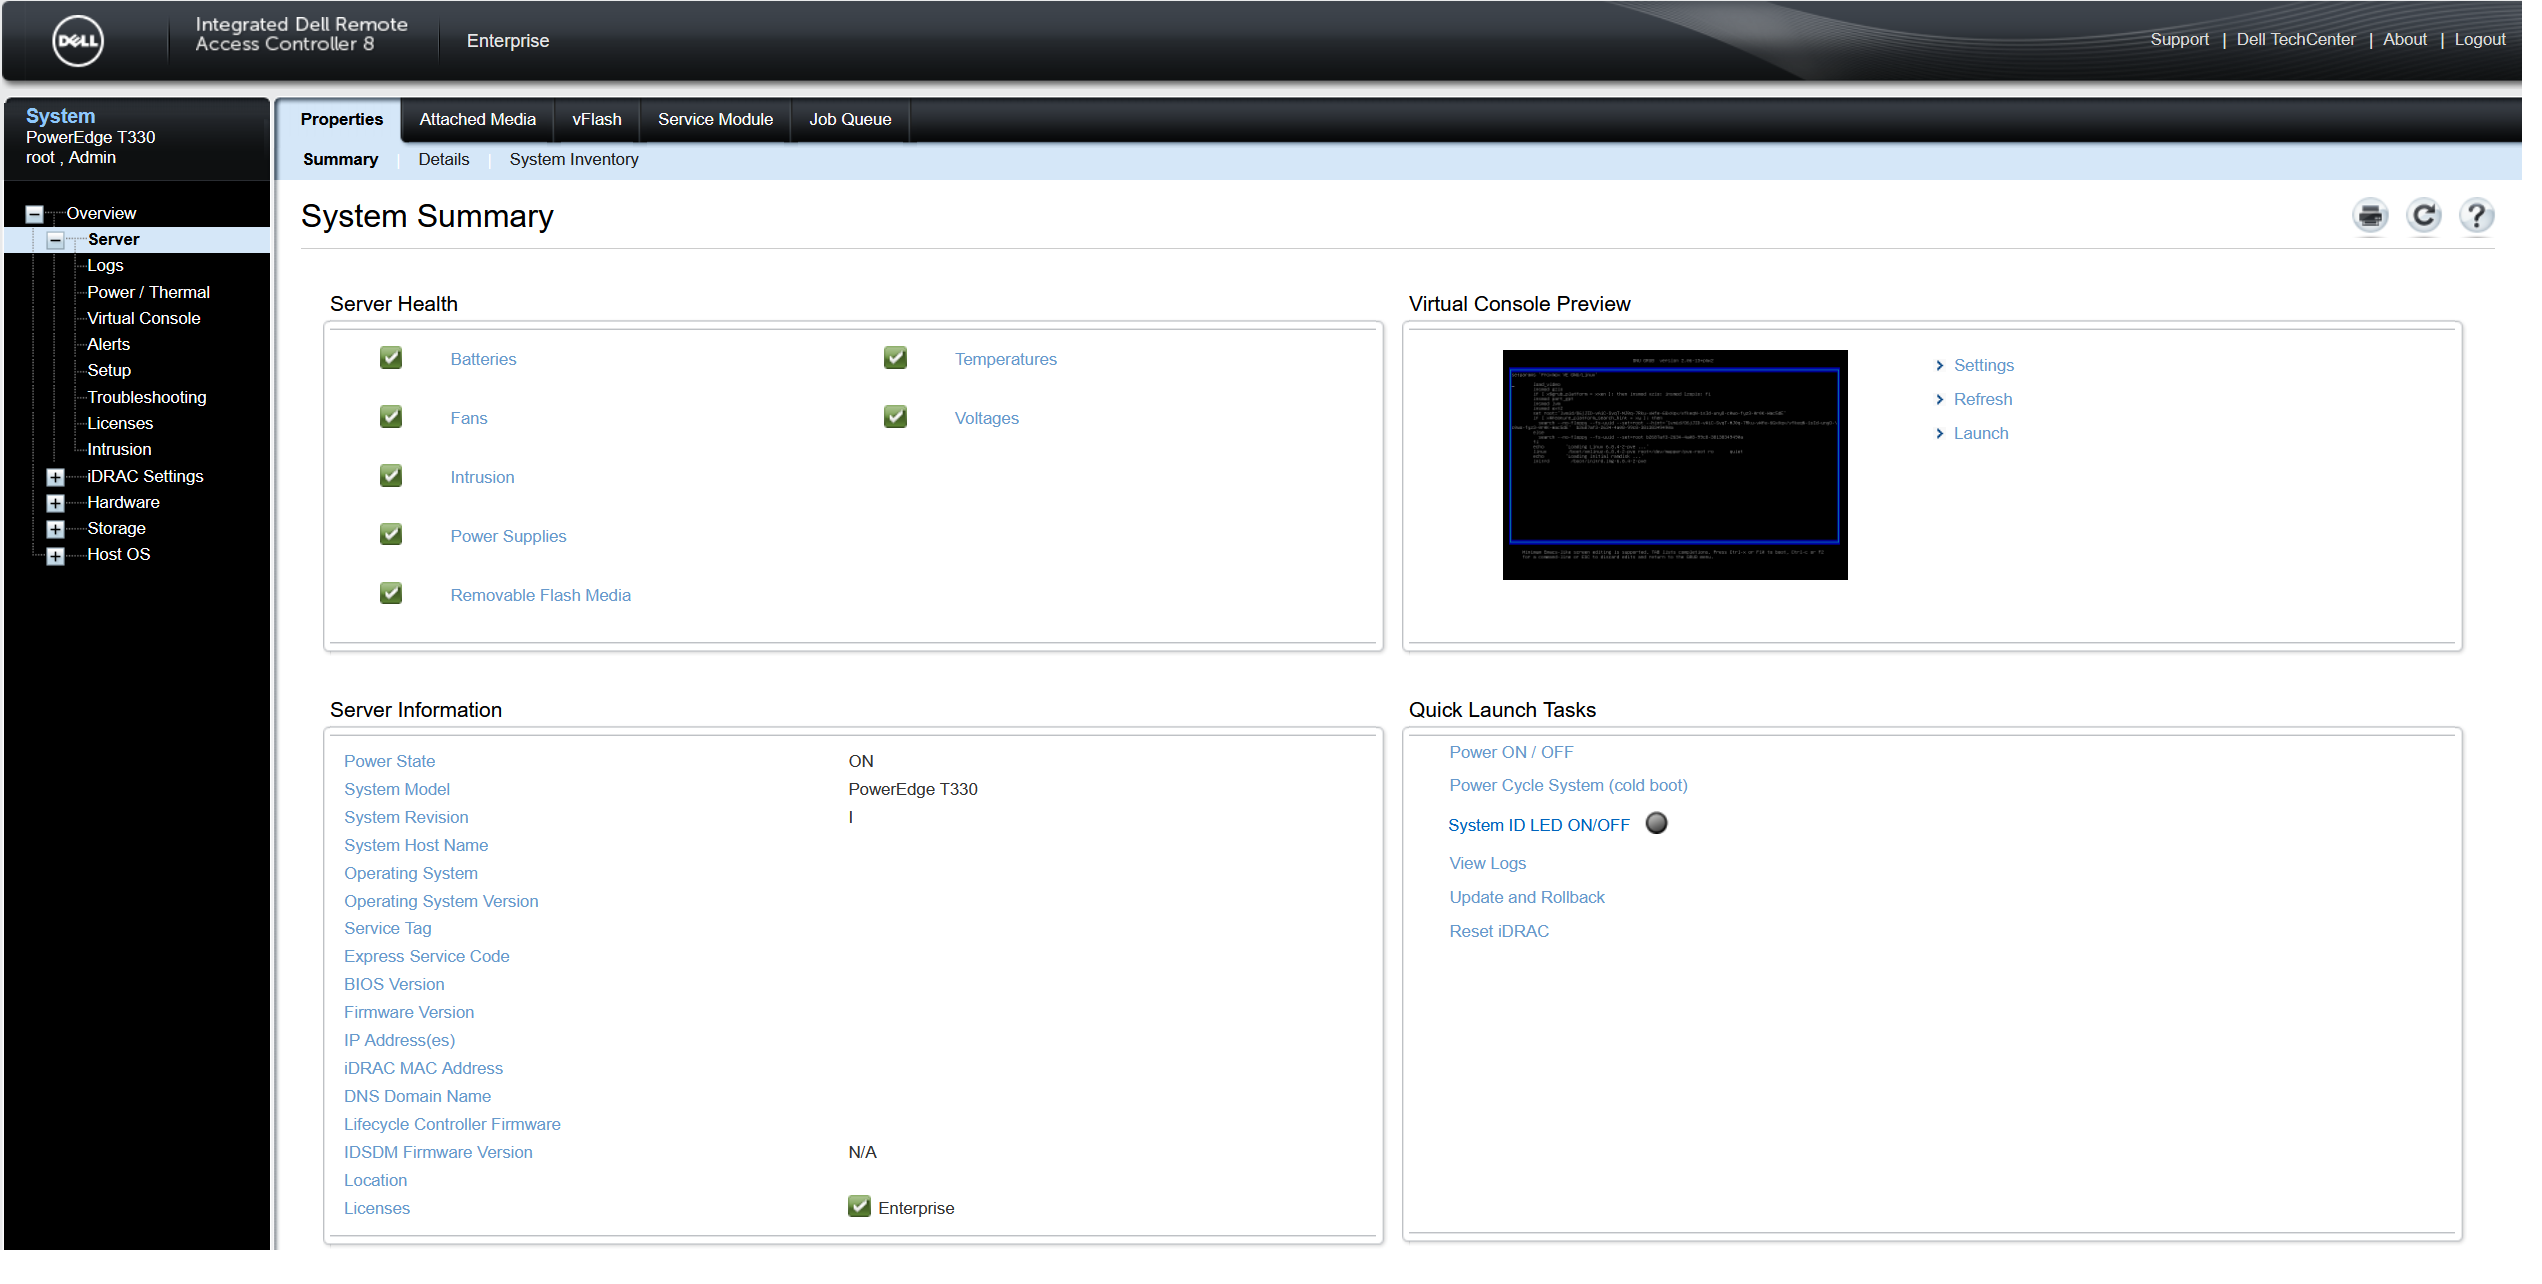
Well, it would have been had I had any removable media laying around at home. Naturally, all my USBs seem to have grown legs and run off, so that however wasn’t an option. But “can’t you just install it through iDRAC?”, I hear you ask. Whilst that is indeed a supported feature, it’s only possible through the “Virtual Console”, which, whilst being included in all iDRAC versions for blade servers, is a “licensed feature” for rack and tower servers.
The license, sold through Dell and delivered as an XML that can be uploaded to the server, costs around 120 euros. Obviously, I wasn’t ready to spend 3 times more than I paid for the whole server for a license. Luckily, however, a few options exist. They are available for purchase on Ebay for around 20 euros or, even better, “Enterprise Extended Trial” licenses which provide 240 days of enterprise features can be found on the internet for free!
Virtualisation Platform Setup
Finally, with the Virtual Console enabled, I could install a virtualisation platform. But what to choose? Having already done a fair bit of research prior to buying the server, I decided on Proxmox VE for a few reasons. Namely, it’s free for hobbyists, open-source, and seems relatively easy to get started with whilst also being resource-rich. Also thanks to VmWare’s changes in pricing, its popularity within business applications seems to be growing, and thus I feel it may be useful to learn for the future.
After downloading the Proxmox ISO and installing it to the machine, I was ready to go! Eagerly I set up a Kali Linux VM, and booted into it.
Whilst the process was simple, and I had it set up in no time, I then ran into an issue - namely that of my VM not getting access to the internet. After verifying that my Proxmox instance itself did have a connection, and several hours of troubleshooting, I hadn’t gotten far, so decided to instead try a different distribution, namely Parrot OS (though this was perhaps not the best idea as Parrot OS is practically just built on-top of Kali Linux).
This didn’t work either, and upon a few changes in Proxmox, I even managed to change the settings such that I couldn’t access the web-portal any longer. Whilst it would have been possible to configure the Proxmox network files manually through the Virtual Console, I decided to instead just reinstall Proxmox, and was finally rewarded with working networking within the (now reinstalled) VMs!
Plans for the Future
With Proxmox finally set up, and a couple of VMs installed for experimentation and for pentesting, I’ve been considering what the next steps are for the server. In regards to hardware, I’m in sore need of more memory, so I’ll probably be looking to get at least 32 GB in the near future. Sadly, I’m also somewhat limited in that I only have 4 cores, and no supported CPU on this system has more.
In terms of things I’d like to do however, a few ideas that have come to mind are hosting my own server for quickly sharing files between my devices (and friends), and setting up a few automatic vulnerability scanners, alongside perhaps a private messaging server (for example via Synapse). As mentioned previously, running local AI models is also something I’m considering. However before any of that, I need to configure a VPN, to avoid unintentionally exposing any of my services to the open web (currently I just have AnyDesk set-up within a few of my VMs for remote access if need be).